Monday, June 28, 2010

Guest Blogger ~Lemon Squeezy Home~

Hi everyone, I have a special guest today! If you haven't met Christie from Lemon Squeezy today is your lucky day. She has a very fun and inviting blog that is filled with her ideas and tutorials. You can purchase her creations at her etsy store too!

She is going to share her newest tutorial with us. I am so excited to have her!

I am so excited that Sachiko asked me to guest post today on her lovely site.  I love the stories she tells that help us get to know her better.  And I of course LOVE the awesome tutorials for so many cute and beautiful things!  She is such a sweet and creative person--I just love her blog!  Thank you so much for having me!!!

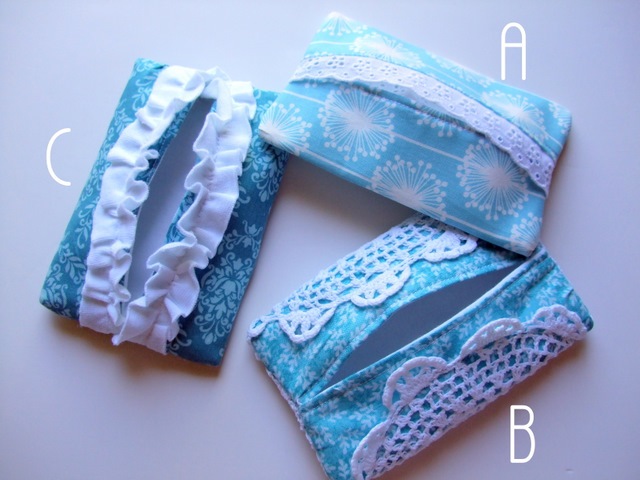
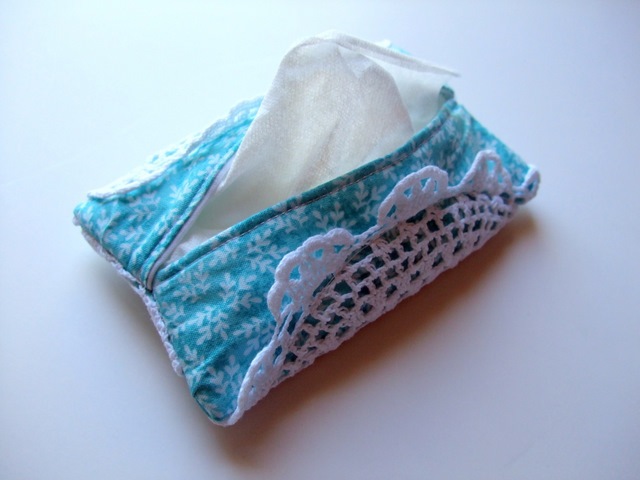
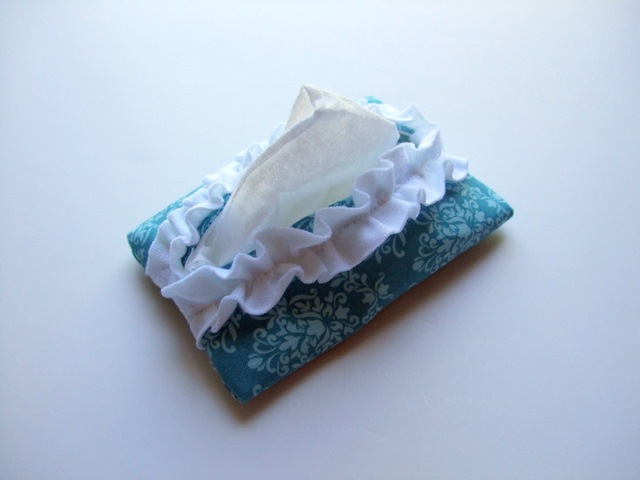
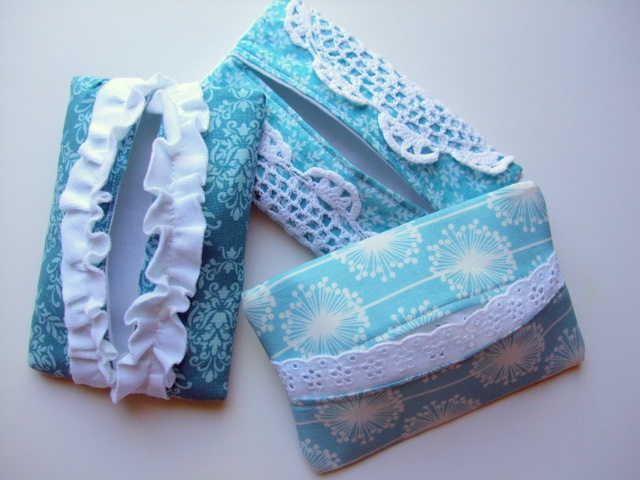
I thought initially that this tutorial would be better during the winter months, but with allergy season in full swing, tissue pouches are great any time of year!  They are so easy to make as well.  You can whip one up in less than half an hour (probably closer to 15 minutes!).
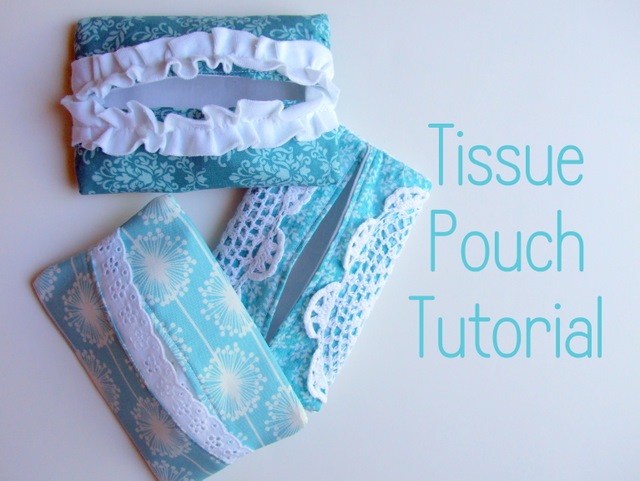
DSCF9735-1 DSCF9742-1
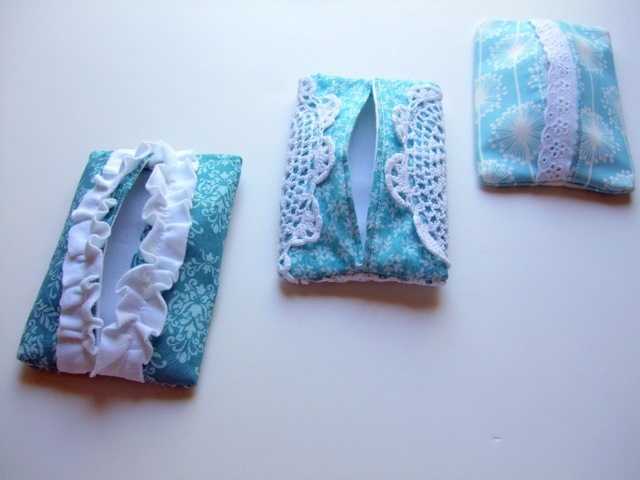
The main tutorial will show how pouch A was made.  Steps for pouch B and C are included at the end of the main tutorial.
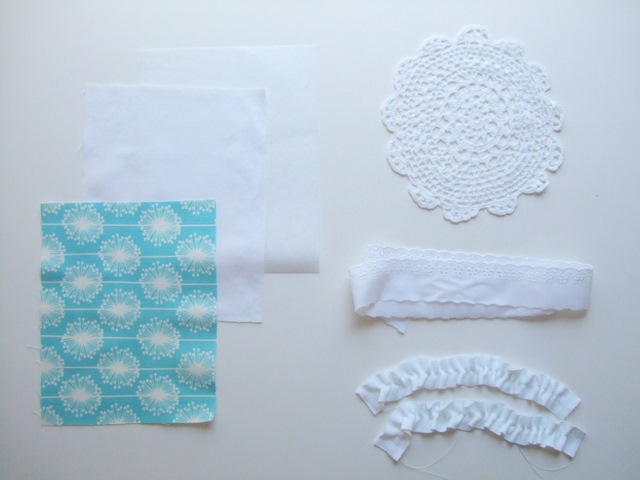
What you’ll need:
-one 6” x 7.5” piece pattern fabric
-one 6” x 7.5” piece fabric for the lining
-one 6” x 7.5” heavyweight fusible interfacing
-For pouch A:  two 6” pieces ribbon.  
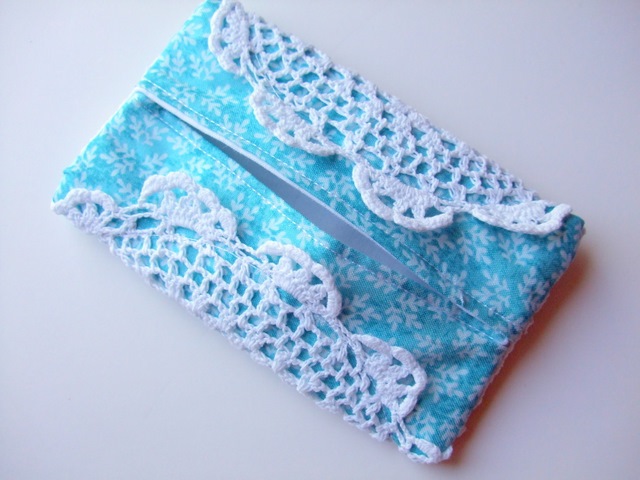
-For pouch B:  one doily.  
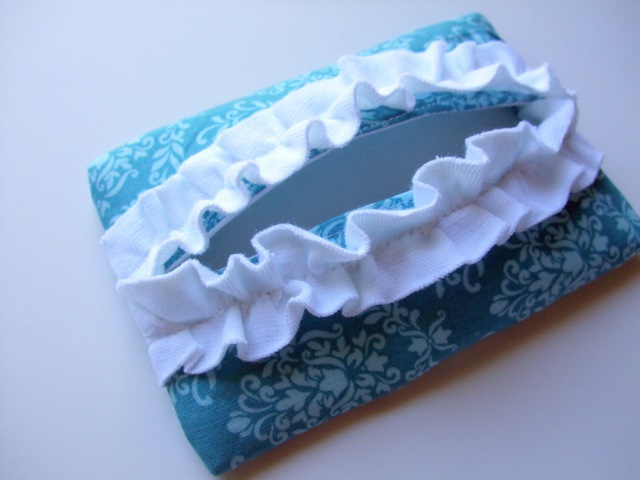
-For pouch C: two 1” x 12” strips knit, that have been sewed with a basting stitch, and stitches pulled to create two ruffles.
DSCF9698-1 
Step One: 
Iron the interfacing onto the wrong side of the lining fabric. 

Step Two:
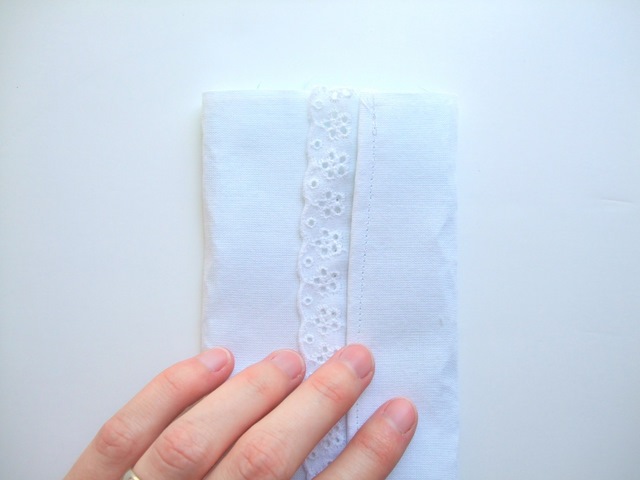
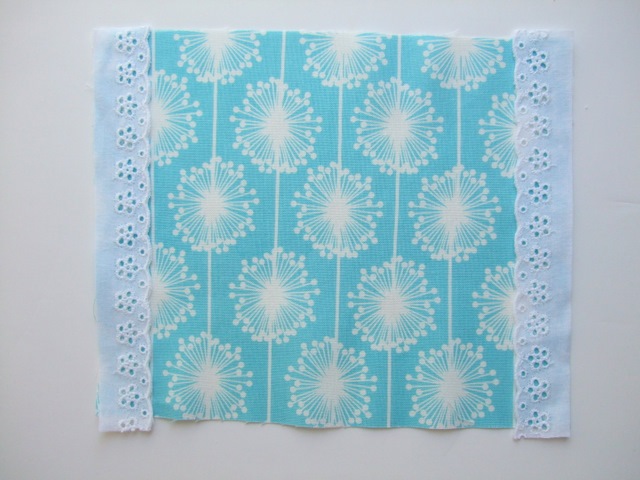
Take your outer fabric and place the two 6” strips of ribbon onto the 6” sides of the fabric.
DSCF9699
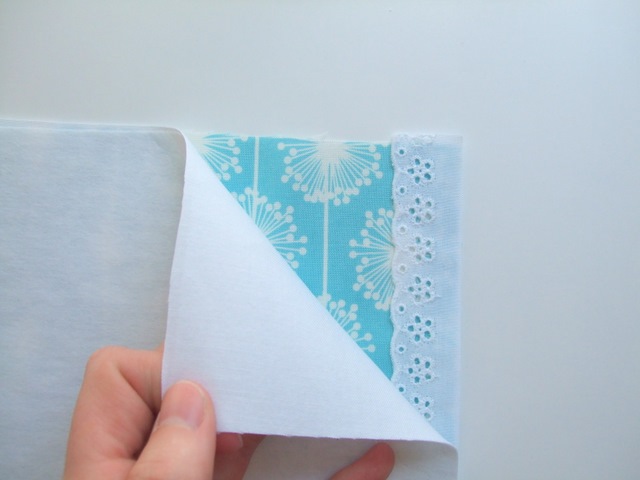
Take your interfaced lining and place the right sides of the lining and outer fabric together, making sure to have the ribbon still in place along the 6” edges.
DSCF9700
Step Three:
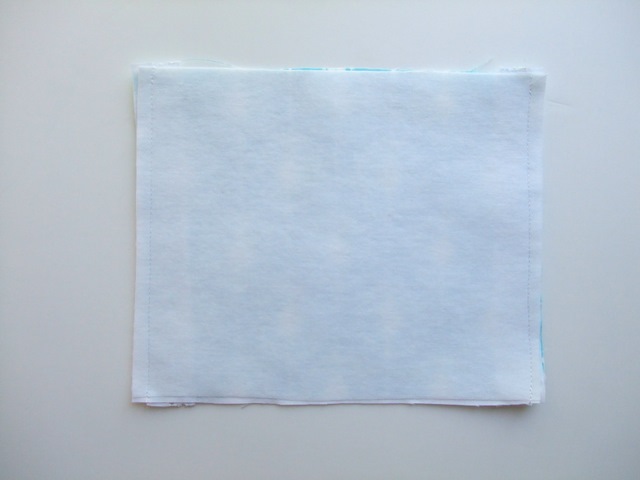
Sew the two 6” sides together through all layers with a 1/4” seam.
DSCF9702
Step Four:
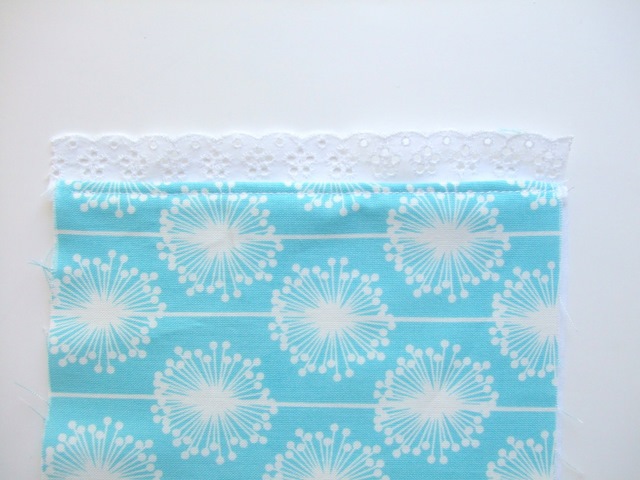
Turn right side out and topstitch along both sides with the ribbon.
DSCF9704
Step Five:
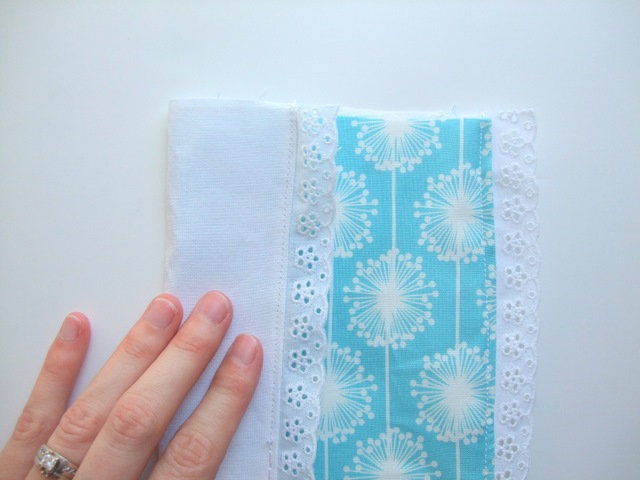
Take one of the sides with the ribbon and fold in to the middle of the fabric.  Repeat with other side.
DSCF9705
DSCF9706
Step Six:
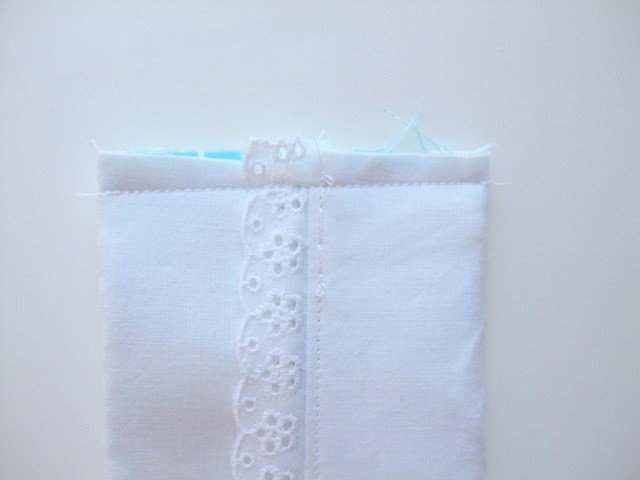
Stitch a 1/4” seam.  Maybe straighter than mine:).
DSCF9707
Step Seven:
Clip corners and turn.  All done!  SO simple!
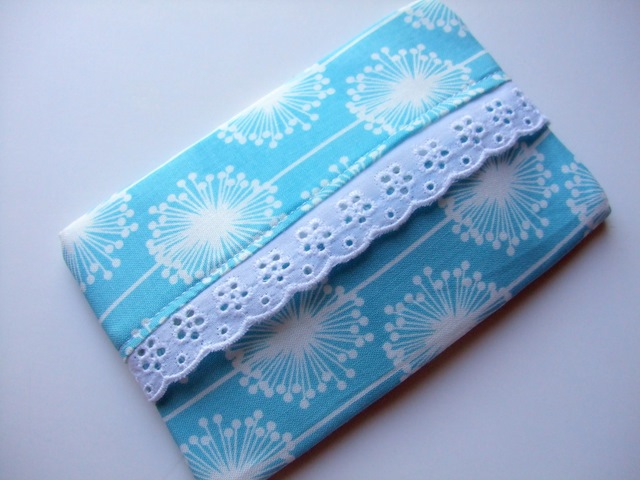
DSCF9709
DSCF9730
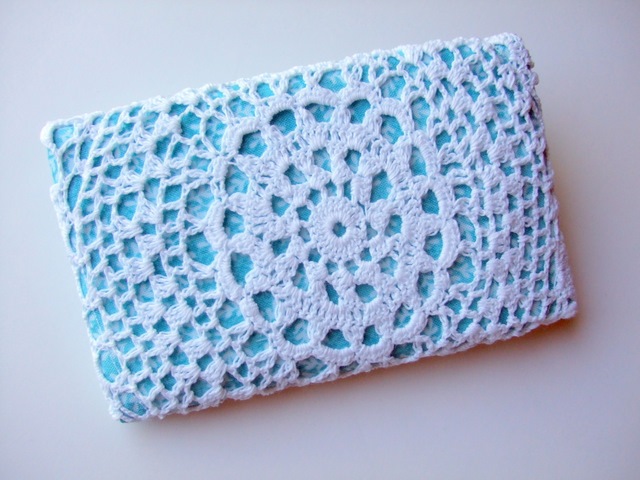
For pouch B, sew the doily onto the outer fabric before doing anything.
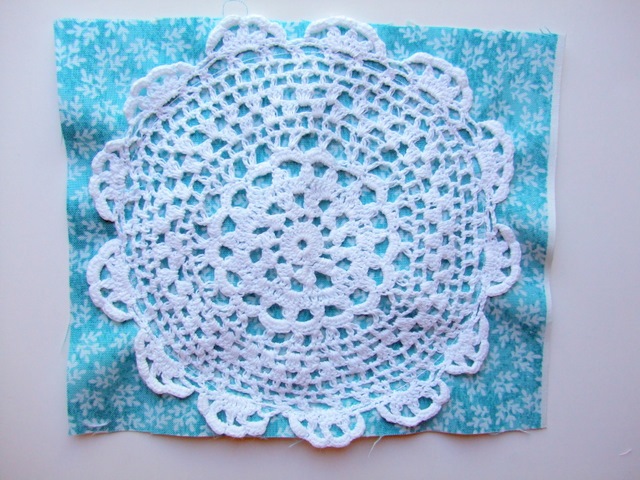
DSCF9711
Sew the interfaced lining on the same way as pouch A in step three.  Turn and topstitch along the 6” edges.  Finish with steps five through seven.
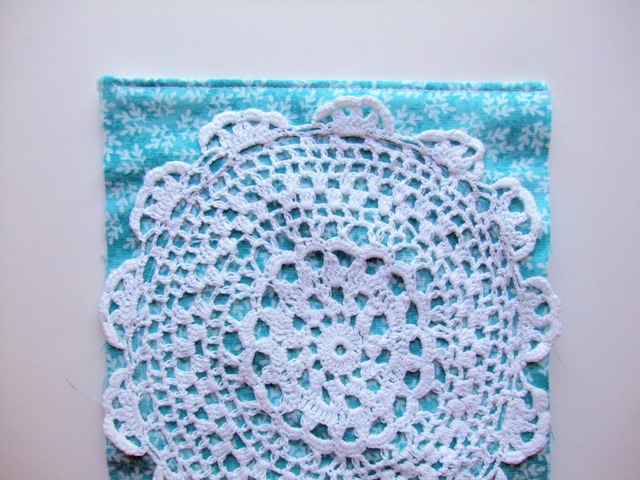
DSCF9712
DSCF9713
DSCF9714 DSCF9729
For pouch C, take your two ruffled knit strips and place along the two 6” sides of outer fabric.  Sew along the basting stitches on the strips, onto the outer fabric.

DSCF9720
Fold the ruffle over for the next part.

DSCF9721
Sew on the interfaced lining with right sides of outer and lining together, making sure not to catch the ruffles.
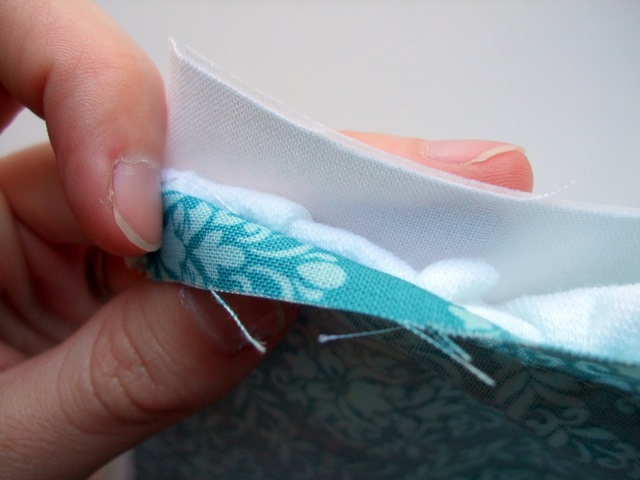
DSCF9722
Topstitch the same way as step four, making sure to fold back the ruffle so you don’t catch it.  Finish by using steps five through seven!
DSCF9726
DSCF9732
DSCF9740
DSCF9734
Thank you for letting me come today, Sachiko! It was fun!

So darling! Thank you so much for sharing your talent with us Chritie. It was such a delignt to have you!

Note: I will be taking a break from the link party this week. Come back to see me on Wednesday for a regular post! :)

Saturday, June 26, 2010

Link Love No. 13!

Wow, 136 links...I am so excited to see all your projects; and I had the hardest time deciding which ones to feature, because, there are so many great projects and ideas. I just wanted all of you to know that eventhough I can't feature everybody, I really appreciate you taking the time to visit and link to my party.

OK, are you ready to see some of the wonderful links?

The first one is linked by A few of my favorite things. She won these butterflies in a giveaway, she didn't make them, but I really liked the way she decorated with it. Aren't they pretty? I love how these butterflies add color to the wall...


Baby night night botique shared the prettiest dress made out of a t-shirt. I JUST LOVE IT!

These pretty Pet food canisters were made by The fickle Hobbyist. Do you have some large cans (the kind that has popcorn inside around the Christmas time)? I never thought that they could be so useful and pretty. The lettering makes it look so stylish.

You have to go to For the love to check out more pictures to see what she did for her baby's first birth day party. Oh, my gosh, she did such an amazing job, cute, cute, cute!


I have a white kitchen aid that I love, but I wondered how I could paint this if I wanted to... You Craft Me Up! shows you how to paint your kitchen aid with a step by step tutorial. Thank you for sharing!


I am simply amazed with how all of you people are so creative and resourceful. Isn't it fun to be a part of blogland? Thanks again everyone for participating!

By the way, make sure to come back on Monday. A Special blogger is coming to visit Tea Rose Home and share her newest tutorial!

Friday, June 25, 2010

Tutorial ~ Oh, So Easy Mouse Pad~


Just in case you are wondering, the last post didn't inspire me to do this tutorial, it is just a coincidence. I just noticed that both posts are about "mice", but this one is about a cute and useful mouse pad.

Our old computer was having issues, so we had to replace it. I wanted a new mouse pad, and decided to make one.

{you will need}

Two fabrics

Double-sided fusible ultra firm stabilizer (I found mine at Joann's. They were narrow, and pricey (7.99/yrd), so I only bought 1/4 yrd, you can make 2- 9" x 9" mouse pads.)


{How to}

This is sooo easy. If you have never used double-sided fusible stabilizer, make sure to get the instructions when you buy them at the store.

1. Pick out very pretty fabrics, follow the instructions and fuse the fabrics to the stabilizer.

2. I used a circle mouse pad from IKEA to trace a circle on to the fabic fused stablizer with pencil (very lightly). You can use bowls and dishes to do this with too.

3. Then, I cut out the circle with pinking scissors. If you prefer square, that would be pretty as well :)


That is it. Isn't it so easy and simple? This will make a perfect gift too. I cut out some hearts from the leftovers around the circle, I thought they would make a cute charm for keys or hand bags.

Tuesday, June 22, 2010

Link Party No.13,

Warning! This post may contain something you don't wont to read, if you have a weak stomach please stop reading and just skip to the link party. If you are REALLY curiouse what happend to me today, keep reading at your own risk...

I have been in a cleaning and organizing mood lately(again), this time it is sorting and organizing my piles and piles of fabrics. I have fabrics in the hobby room that my husband I share, I have fabrics in the laundry room too. Our air conditioning wasn't working very well, so the repair guy was going to come to take a look today. I had to move those fabrics along with the toy bins, so he could open the door to the furnace.

I thought I would take care of that in the morning, so when he comes, it would all be clean and he could get to it right away, it would save time for both of us.

So, I was moving stuff out, and vacuuming as I was moving the plastic drawers on wheels, I started to smell something bad. "oh...". I didn't want to move the last set of plastic drawers but I did. I had to... There was a dead mouse.

"AHHHHHHHH!!!!!!"

Our laundry room is not very big; so, with a vacuum cleaner in one hand, I jumped up in the air, arms flailing, slammed into the door and darted out of the laundry room. The kids stopped what they were doing and came to my rescue... no, they were really curious as to why a 30-something lady, who happened to be their mother was screaming and jumping around the kitchen.

"What happened mom?" Christopher asked,

"There is a dead mouse! Ahhh I hate it! What am I gonna do?!"

They looked at the source of my screams and said "oh, cool". Then went back to what they were doing. So cold. My husband was supposed to be my hero for times like this and come rescue me, but he was on the phone up stairs(job related), we were not to disturb him...

I stood there for a while (there was a good 6 feet or so from the mouse to me), hoping that it would magically disappear or one of my children (9 and under) would gladly do the dirty job for me, but none of these happened.

So, I got disposable gloves, got an empty cereal box and made a device to catch the mouse to throw it in the trash so I wouldn't have to touch it. Ok... this part is very gross. You can stop reading it if you want. The mouse was stuck to the floor; I almost gagged and was in tears as I was scraping it off the floor, with my eyes closed.

I used nearly half the spray bottle of Lysol to clean the floor after that.

Ogh! After everything was done and over, my husband came downstairs...

Anyways, I have been making lots of swaddle blankets lately. I used to buy flannels on sale thinking "oh cute, I will make a blanket for someone's baby shower". Then, never got around to it. Since I am trying not to buy so much fabrics this year and use whatever I have, finally making these blankets are a good thing. There are many ways to make baby blankets, but I am doing the self binding method. This is a very quick and easy way to make a baby blanket. Maybe I will post a tutorial in the near future.


Well, it is your turn to show us what you have been working on!

Here are the rules:

1. Please post something YOU made. It doesn't matter if it is crochet, quilt, clothing, anything would be fine. I want to see it! If you use someone's idea or patterns please give them the rightful credit.

2. Link to your specific post, that way it is easier for everybody to find and read it.

3. Please grab the "Tea Rose Home" grab button, and link back from your post. If you can mention the party in your post or place the button on your side bar, that would be great! I want more people to have a chance to come and show off their creation.


Thank you for visiting my link party, make sure to visit everyone and be inspired! :)

Sunday, June 20, 2010

Link Love No.12!

First of all, I would like to say thank you for all of your nice comments on my last post. Most of them were congratulating us for my husband for finding a job.
I am so touched by your kindness for taking the time to leave comments. Yes, we are so relieved!

Also, some of you are going through the same type of situation and having difficult times. I hope you and your loved ones can find a job quickly and not need to worry...

We had a layed back and fun Father's day yesterday. My husband opened presents from the kids, and we just enjoyed each other's company. I cooked one of his favorite Japanese dishes called "Tonkatsu". It is basically, breaded deep fried pork.


I hope you had wonderful Father's day as well.

Ok, it is time for link love! Here are some of my picks for this week...

I have been thinking about making over my laundry room this summer. Then, this link caught my eye. Junk Style shared her laundry room makeover, it looks very nice and functional. I love the hooks she created.


It's a wandering woman's life shares her Butter Cup Bag. She used a pattern from the 1950's and created this bag. I think the fabric she chose is perfect for this project. Very pretty and classic looking.


Check out this Beach Towel Backpack from The Train to Crazy. Isn't this so nice? It is soo cute and functional! She shares the tutorial on her blog if you want one for your loved ones. Very nice summer project!


Craft & Sutch shows us how to make these picture holders. This will make a nice gift, even as stocking stuffers (it is never too early to think about Christmas gifts)....


I fell in love with this Fancied Up Clock by The Roseland Family. Several days ago, I noticed that my clock was broken. I always forget that it's not working and look up to see what time it is. I seriousely need to get a new one. This will go on my to do list. I love the color she used on this project, so pretty!


Thank you again for your participation! If you are the ones that are featured, go ahead and grab the "I was featured" button for your sidebar. I hope to see you all at the next link party too!

Saturday, June 19, 2010

Life's Curve Ball


Several posts ago, I mentioned that sometimes life throws a curve ball... and I said that I hope I can laugh about it someday. Well, I will share our experience with you today.

At the end of May, my husband lost his job. The company he was working for decided to close the office in this area. All the people in the same department were let go. Wow...

I had a precedure the week before, so he was working from home to take care of me, and the day the lay off happened he went to work not knowing that it was going to happen.

I was resuming my regular daily routine, then, around the noon, the phone rang...

My husband: Hi hun...I don't have job anymore.

Me:....(ok, my brain was tryiing to process what I just heard and decide, either he is joking or if he is not joking, what to say)

Husband: Umm... are you there?

Me: yeah...really? Why?


What made it harder was, two days before the lay offs, we planned our first Disneyland trip, got reservations, AND told the kids about the special family vacation we are doing. Talk about curve balls, if we would have known, we certainly wouldn't have planned the trip, nor would we have told the kids about the trip.

We had a family conference that afternoon, and told our kids what was happening.

husband: Well, I have something very important to tell you... I don't have a job anymore.

Michael: What!? You lost it!!? (As if he had lost a set of car keys.) How!?

Husband: Well, they closed down the office.

Michael:(his eye were looking somewhere in the air) Are we poor now?

Me: Not now, but if he can't find job, we might become poor.

Then we had to tell them that we probably won't be able to go to the Disneyland, and we have to cut back our spending and pray that daddy will find new job soon.

Michael was thinking about something and shouted, "How about BEST BUY?" at first we looked at each other and thought that "What is he talking about? Is he ok?", then, it came to me that there is a girl, he liked in his class, whose dad works at BEST BUY. He was trying to help find work.

Over the next few days, Michael would call out random company names to his daddy he probably heard on commercials and stuff to see if he could work there. He even told him that may be he could become a "bug killing guy".

They were disappointed about not going to Disneyland, but I think they were more worried about becoming poor and being homeless. I found out from my mother-in-law that, Michael even asked her if it would be ok for us to move in with them; if his daddy couldn't find a job.

They were all very helpful, if they wanted something at the store, and I say no, they didn't complain. I even told them that there were extra chores around the house for them to earn money. I am not paying until daddy gets a job, but they were understanding. Every morning and night, they prayed that their daddy would find a job soon.

My husband's persistant job search, lots and lots of friends' help, recommendations, and many other peoples' prayers (Thank you everyone!!), I am so happy to say that he got job offer today!

We had another family conferance today.

husband: Well, kids, I want to say thank you for your help and prayers over the past few weeks. Today, I got a job offer.

Michael: They gave it to you?!! (As if they returned his lost car keys)

husband:(chuckle) yes they did, and we are going to Disneyland this summer.

Kids:YEAH!!!!!!! (they were jumping up and down in their chairs as they clapped their hands.)

I know we are very fortunate to find a job so quickly in this economy. Life's curve ball came as a shock to us, but I am so grateful that we didn't have to worry for a long time. Although, this experience definately brought us closer as a family; and I know for sure that the kids appreciate thier daddy even more. Because of his hard work, love, and devotion for our family, we have food on our table and clothes on our backs and much more.

Father's day is coming up. I saw Michael writing a letter to his daddy in his room tonight. Chirstopher was asking his daddy what his favorite candy bar was with his piggy bank in his hand( talk about being sneaky and subtle). My husband and I looked at each other and smiled.

Oh, and Rachel told him that she wants to marry him when she is older. That totally melted his heart, and I know that effect will last for many Father's days.

I am going to spend lots of time with my family and I am gonna plan a special Father's day dinner for him.

Everyone, have a happy Father's day!

Note: I will post "Link Love" on Monday. Come back to see me! :)

Wednesday, June 16, 2010

Link Party No.12 and My Basket Makeover

I love baskets. I have written about baskets, I have done many basket makeovers in the past and blogged about them. If you have been reading my blog for a long time, you might be thinking "enough already" (no, Tea Rose Home readers are nice people, you don't think that way... I hope).

I like the kind of basket that can sit on its own and has handles on both sides, They are perfect for making over to handbags. I find them at yard sales and thrift stores, but to find the ones that I like that are in a good condition is very rare.

Going back to the basket makeovers... I will share my past makeovers. I added lining, lace, pom-poms, ribbons and flowers.


A while ago, I was going through my favorite Japanese magazine, and an article totaly opened my eyes to a new area of basket makeovers! They featured the very popular designer in Paris, Céline Dupuy. She does beautiful basket makeovers and she spray paints the baskets! I have seen many baskets that are painted before, but when I do a basket makeover, it never occured to me to paint mine. I love the natural colors of baskets, I guess I wanted to keep the original look.

Although, her work was amazing, and inspiring. I felt like my basket makeovers have more possibilites too. I had to try it right away (yeap, that's me, my curiousity won't keep me waiting for long).

This is the basket I just madeover...


Spray painted basket meets Heather Bailey...


I LOVE IT!! It takes more time, not to mention the fumes, but I love the results. What a difference a coat of paint makes! To color the basket and sew the lining was such an exciting process, I could hardly wait to put everything togethter. I also made little accesories on the side.

I think this is going to be my obsession for this summer.

Ok, ladies, what have you been working on? Let us see your wonderful creations, and say hello to everyone!

Here are the rules:

1. Please post something YOU made. It doesn't matter if it is crochet, quilt, clothing, anything would be fine. I want to see it! If you use someone's idea or patterns please give them the rightful credit.

2. Link to your specific post, that way it is easier for everybody to find and read it.

3. Please grab the "Tea Rose Home" grab button, and link back from your post. If you can mention the party in your post or place the button on your side bar, that would be great! I want more people to have a chance to come and show off their creation.


Blog Widget by LinkWithin